Building your gaming PC can be one of the most rewarding experiences for any tech enthusiast. Not only do you get to choose every component to suit your exact needs, but you also gain a deeper understanding of how your machine works. Plus, it can be more cost-effective than buying a pre-built system. Let’s dive into the process, step-by-step, to help you create the gaming PC of your dreams and how to build a gaming PC.
Why Build Your Gaming PC?
Cost Efficiency
One of the primary reasons to build your gaming PC is cost efficiency. When you buy a pre-built PC, you’re often paying a premium for assembly and the brand name. By selecting and assembling the components yourself, you can save a significant amount of money.
Customization and Upgradability
Building your PC means you can customize every aspect, from the type of CPU and GPU to the style of the case. This level of personalization ensures that your PC meets your specific needs and preferences. Additionally, a custom-built PC is easier to upgrade over time, allowing you to keep your system current without replacing the entire machine.
Satisfaction of Building Something Yourself
There’s a unique satisfaction that comes from building something with your own hands. Completing a gaming PC build provides a sense of accomplishment and a deeper connection to your machine.

what components do you need to build a PC
Building a gaming PC requires a careful selection of components, each playing a crucial role in the overall performance and functionality of the system. Here’s a detailed look at the essential components you’ll need:
CPU (Central Processing Unit)
The CPU, often referred to as the brain of the computer, handles all the instructions your computer receives. In gaming, the CPU is responsible for executing game logic, physics, and processing tasks that are not offloaded to the GPU. Popular choices for gaming CPUs include AMD Ryzen and Intel Core processors, known for their strong performance in both gaming and multitasking.
GPU (Graphics Processing Unit)
The GPU is perhaps the most critical component for gaming. It renders images, animations, and videos for the computer’s display. The GPU offloads these tasks from the CPU, allowing for smoother and more visually stunning gameplay. High-end GPUs like Nvidia’s RTX series or AMD’s Radeon RX series are preferred for their ability to handle modern games at high resolutions and frame rates.
Motherboard
Your computer’s motherboard, which connects all the parts, is its structural core. It determines the type and amount of hardware your computer can use, including the CPU, RAM, and storage. When choosing a motherboard, ensure it is compatible with your CPU and has the necessary slots for your RAM, GPUs, and storage devices. Motherboards also come with various features like built-in Wi-Fi, advanced cooling solutions, and multiple ports for peripherals.
RAM (Random Access Memory)
RAM is the temporary storage your PC uses to store data that is frequently accessed or being used. For gaming, 16GB of RAM is generally sufficient, but 32GB can provide a performance boost, especially for more demanding games or multitasking scenarios. Higher RAM speeds (measured in MHz) can also improve performance, but the difference is often minimal compared to the amount of RAM.
Storage (SSD vs. HDD)
Storage is where your games, files, and operating system reside. Solid State Drives (SSDs) are faster than Hard Disk Drives (HDDs), providing quicker boot times and faster game load times. Many gamers use an SSD for the operating system and their favorite games, with a larger HDD for storing additional files and games. NVMe SSDs, which use the PCIe interface, offer even faster speeds than traditional SATA SSDs.
Power Supply Unit (PSU)
All of your PC’s components are powered by the PSU. It’s crucial to choose a PSU that can supply enough power to support all your hardware. PSUs are rated by wattage; a typical gaming PC will require a PSU rated between 500W and 750W, but this can vary based on your specific components. Look for a PSU with an 80 Plus rating for better energy efficiency.
Case
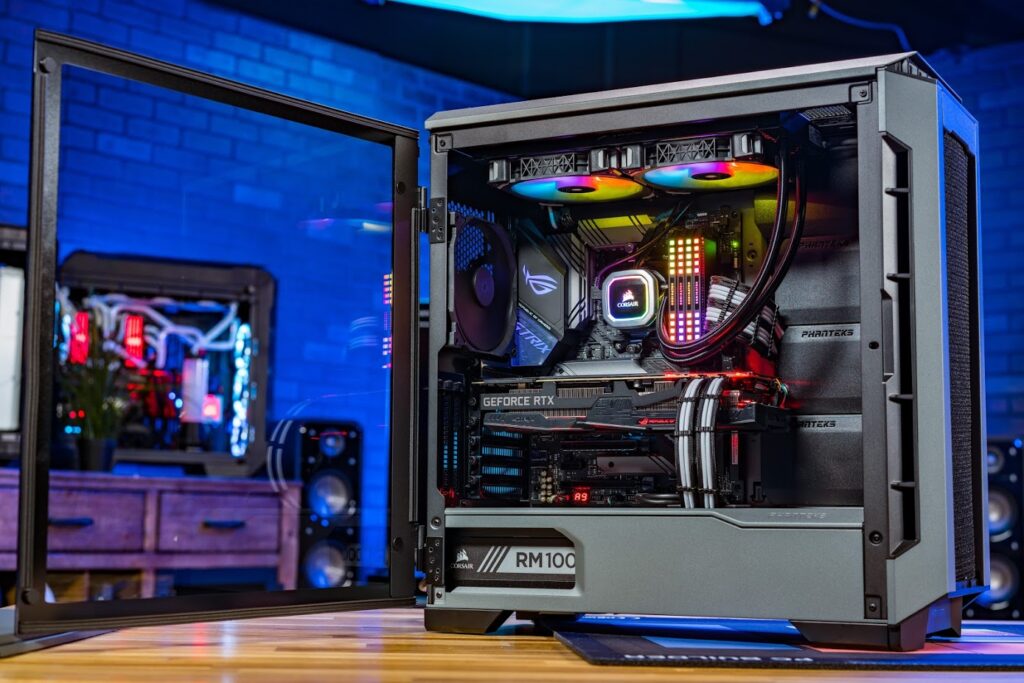
The case houses all your components and affects the overall look and cooling capability of your build. Cases come in various sizes (ATX, Micro-ATX, Mini-ITX) and offer different features like tempered glass panels, RGB lighting, and advanced airflow solutions. Ensure your case is large enough to accommodate your motherboard, GPU, and any additional cooling solutions you plan to use.
Cooling System
Keeping your components cool is vital for maintaining performance and extending their lifespan. Liquid cooling and air cooling are the two primary forms of cooling. Air coolers are more common and easier to install, using fans to dissipate heat from the CPU and GPU. Liquid cooling systems, which use water to transfer heat away from components, can provide better cooling performance, especially for high-end builds or overclocking.
Understanding each of these components and how they interact with one another is crucial for building a gaming PC that not only meets your needs but also provides the best gaming experience possible.
Step-by-Step Guide to Building a Gaming PC

Step 1: Planning Your Build
Setting a Budget
Determine how much you’re willing to spend. This will guide your choices for components and help you prioritize what’s most important for your build.
Choosing Compatible Components
Make sure all your parts are compatible with each other. Use tools like PCPartPicker to verify compatibility and avoid any potential issues.
Step 2: Assembling the Tools You’ll Need
Screwdrivers
A set of precision screwdrivers is essential for assembling your PC. Make sure you have a variety of sizes to handle different screws.
Anti-Static Wristband
This lessens the chance that delicate components will be harmed by static electricity. Attach it to your wrist and ground it to your case while building.
Step 3: Installing the CPU
Placing the CPU in the Socket
Open the CPU socket on your motherboard, align the CPU with the socket, and gently place it in. Lock it in place with the retention arm.
Applying Thermal Paste
Dust the top of the CPU with a tiny bit of thermal paste. This helps conduct heat away from the CPU to the cooler.
Step 4: Installing the RAM
Opening the RAM Slots
Open the clips on the RAM slots on your motherboard.
Inserting the RAM Modules
Align the notch on the RAM module with the slot and press it firmly until the clips snap back into place.
Step 5: Mounting the Motherboard
Placing the Motherboard in the Case
Carefully place the motherboard into the case, aligning it with the standoff screws.
Securing the Motherboard with Screws
Use the provided screws to secure the motherboard to the case. Make sure it’s securely fastened, but don’t overtighten.
Step 6: Installing the GPU
Aligning the GPU with the PCIe Slot
Remove the necessary expansion slot covers on the case, then align the GPU with the PCIe slot on the motherboard.
Securing the GPU with Screws
Insert the GPU into the PCIe slot and secure it with screws to the case.
Step 7: Installing Storage Devices
Mounting the SSD/HDD
Mount your SSD or HDD in the designated bays within the case.
Connecting the Storage to the Motherboard
Use SATA cables to connect the storage devices to the motherboard and the power supply.
Step 8: Connecting the Power Supply
Placing the PSU in the Case
Position the PSU in its designated area, typically at the bottom or top of the case.
Connecting Power Cables to Components
Connect the power cables to the motherboard, GPU, storage devices, and any other components that require power.
Step 9: Cable Management
Organizing Cables for Better Airflow
Tidy up your cables to ensure good airflow within the case, which helps keep your system cool.
Using Cable Ties and Velcro Straps
Use cable ties and Velcro straps to secure and bundle your cables neatly.
Step 10: Installing the Operating System
Creating a Bootable USB Drive
Download the operating system (e.g., Windows, Linux) and create a bootable USB drive.
Installing the OS on the New PC
Plug in the USB drive, power on the PC, and follow the installation prompts to install the OS.
Tips for a Successful Build
- Double-Check Component Compatibility: Always verify that your chosen components work together.
- Keep Your Workspace Organized: A clean, organized workspace can prevent mistakes and make the build process smoother.
- Follow Safety Precautions: Ground yourself to avoid static damage and handle components with care.
Common Mistakes to Avoid
- Not Applying Thermal Paste Correctly: Too much or too little can affect cooling performance.
- Forgetting to Connect Power Cables: Ensure all necessary power connections are made.
- Poor Cable Management: Disorganized cables can obstruct airflow and cause overheating.
Maintaining and Upgrading Your Gaming PC
Regular Cleaning and Dusting
Dust buildup can hinder airflow and cooling. Use compressed air to frequently clean your PC.
Upgrading Components Over Time
As new games and applications demand more power, consider upgrading your GPU, adding more RAM, or installing a faster SSD.
How to Build a Gaming Desktop
Building a gaming desktop is a rewarding project that allows you to customize your machine to meet your specific gaming needs. Here’s a step-by-step guide to help you through the process.

Step 1: Planning Your Build
- Set a Budget: Decide how much you’re willing to spend and create a budget. This will guide your component choices.
- Choose Components: Research and select compatible parts that fit your budget and performance requirements.
Step 2: Gather Your Tools
- Screwdrivers: A set of precision screwdrivers, especially a Phillips head.
- Anti-Static Wristband: Prevents static electricity from damaging components.
- Thermal Paste: Often included with coolers, but you may need to purchase separately.
Step 3: Prepare Your Workspace
- Clean Surface: Use a clean, flat surface to work on.
- Organize Components: Lay out all your parts and tools to keep them accessible.
Step 4: Install the CPU
- Open the CPU Socket: Lift the retention arm on the motherboard.
- Align the CPU: Match the triangle on the CPU with the triangle on the socket.
- Place the CPU: Gently place it into the socket and lower the retention arm.
- Apply Thermal Paste: Put a small amount of thermal paste on the CPU if not pre-applied.
Step 5: Install the CPU Cooler
- Mount the Cooler: Follow the cooler’s instructions to secure it over the CPU.
- Connect Fan: Attach the cooler’s fan to the motherboard’s CPU fan header.
Step 6: Install the RAM
- Open RAM Slots: Push the clips at the ends of the RAM slots.
- Insert RAM: Align the notch on the RAM module with the slot and press firmly until it clicks into place.
Step 7: Install the Motherboard
- Prepare the Case: Install the I/O shield in the case’s back panel.
- Mount the Motherboard: Place the motherboard in the case and align it with the standoff screws.
- Secure the Motherboard: Use screws to attach the motherboard to the case.
Step 8: Install the GPU
- Open PCIe Slot: Remove the necessary expansion slot covers on the case.
- Insert GPU: Align the GPU with the PCIe slot and press down until it clicks.
- Secure GPU: Use screws to secure the GPU to the case.
Step 9: Install Storage
- Mount the SSD/HDD: Place the drives in their designated bays or mounting points.
- Connect Cables: Attach SATA cables to the storage devices and connect them to the motherboard and power supply.
Step 10: Install the Power Supply (PSU)
- Position the PSU: Place the PSU in its designated area, usually at the bottom or top of the case.
- Connect Power Cables: Attach power cables to the motherboard, GPU, storage, and other components.
Step 11: Cable Management
- Organize Cables: Arrange the cables neatly to promote good airflow.
- Secure Cables: Use cable ties or Velcro straps to bundle and secure cables.
Step 12: Install the Operating System
- Create Bootable USB: Download the OS (e.g., Windows, Linux) and create a bootable USB drive.
- Install OS: Insert the USB drive, power on the PC, and follow the installation prompts.
Tips for a Successful Build
- Double-Check Compatibility: Ensure all components are compatible with each other.
- Keep Your Workspace Clean: A clean and organized workspace helps prevent mistakes.
- Follow Safety Precautions: Use an anti-static wristband and handle components with care.
FAQs
How Much Does It Cost to Build a Gaming PC?
The cost can vary widely depending on your choice of components, but a decent gaming PC can be built for around $800 to $1,200.
How Long Does It Take to Build a Gaming PC?
For a first-timer, it can take anywhere from 3 to 5 hours. Experienced builders might complete it in 2 to 3 hours.
Can I Use a Pre-Built PC Case?
Yes, as long as it’s compatible with your chosen components and offers good airflow and cooling options.
What Should I Do If My PC Doesn’t Boot Up?
Double-check all connections, ensure components are properly seated, and consult your motherboard’s manual for troubleshooting steps.
How Often Should I Upgrade My Gaming PC?
It depends on your needs and budget. Generally, upgrading every 2 to 3 years keeps your system capable of handling new games and applications.
Conclusion
Building a gaming PC is a fulfilling project that allows you to customize your system to your exact needs and preferences. By following this guide, you can navigate the process with confidence and enjoy the fruits of your labor. Happy building!
Read more:


